This post begins from from here: Create a DVD tutorial in case you are lost.
In this post series I talk about mastering a DVD from various DVD sources.
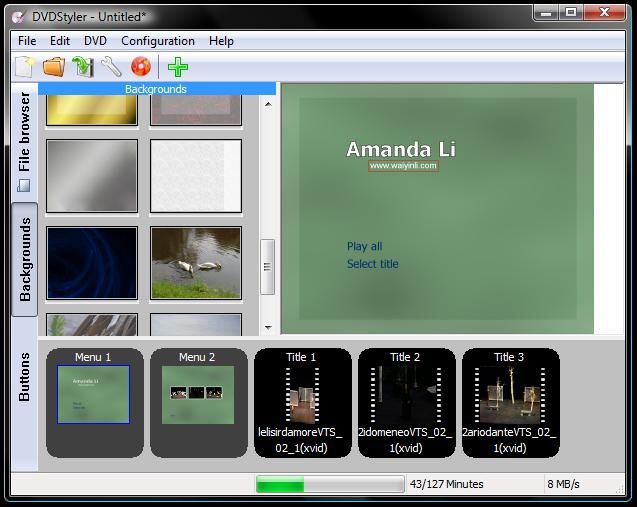
This is a continuation post using DVD Styler, an application to build a DVD image file with menus and videos. This software creates a DVD file (.iso file) which can then be burned to disk, or viewed on the computer. The first part of using this software is here at part
Step 6: Add Text Object
You can also add in new object into menus. Right click and go to add to see a range of objects that can be added. In this case a url is to be added, so click Text.
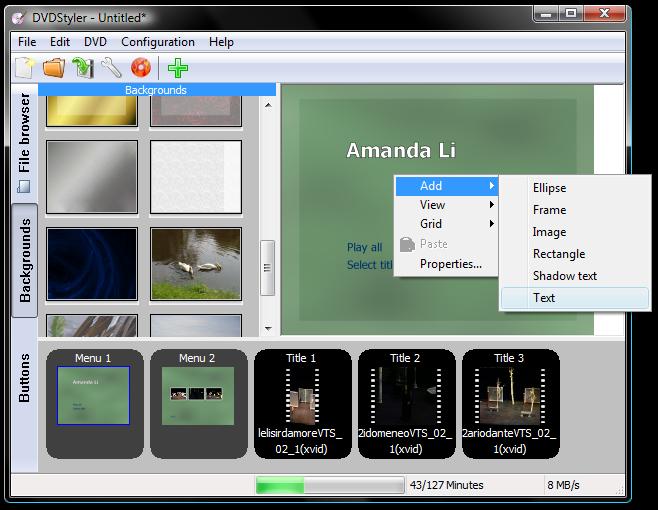 The right click menu on a menu, adding a piece of text
You can then type in the text to appear, and voila! A new text object has appeared in the menu. This can be moved or changed as before in step 5 in the previous post.
Step 7: Add Image Object
Just like text, a picture can be added into a menu using the same right-click menu. Right click on a space, go to Add, then Image. You can then search on your computer for an appropriate photo file.
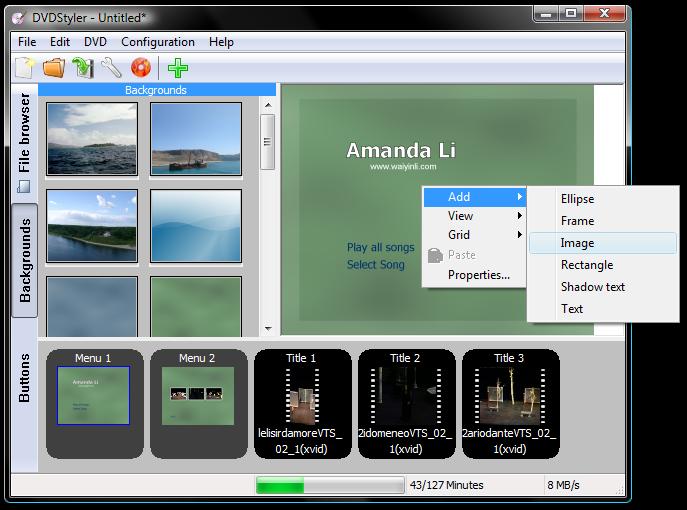 Right click menu, adding an Image to the menu
After adding the picture in, I had to resize it by dragging at the corners of the picture to get the right size, and dragging to the correct position on the menu.
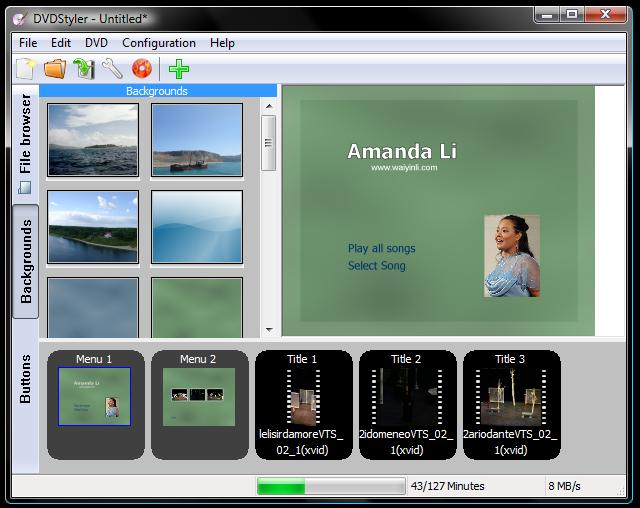 First menu page, showing Amanda’s picture, with URL link added in.
Step 8: Add Information menu page
Extra menus can be added for greater depth into the DVD menu system. Examples of use of this might be for a language selection screen, for a credits page or for extra text information about a movie. It is possible to create a new menu screen from scratch, but because menu settings have already been set in other menus, lets make a copy of an existing one and make changes to it. Go to the bottom pane and click on menu2. Then Right click and click Copy. Now go to a space between menu 2 and Title 1. Right click and then select Paste. This should copy the first menu to a new “menu 3” Use the object editing tools mentioned before. The link buttons picture and text can be removed. New text can be added in to give the new page. Be sure to leave the back button so the user can get back to the main menu.
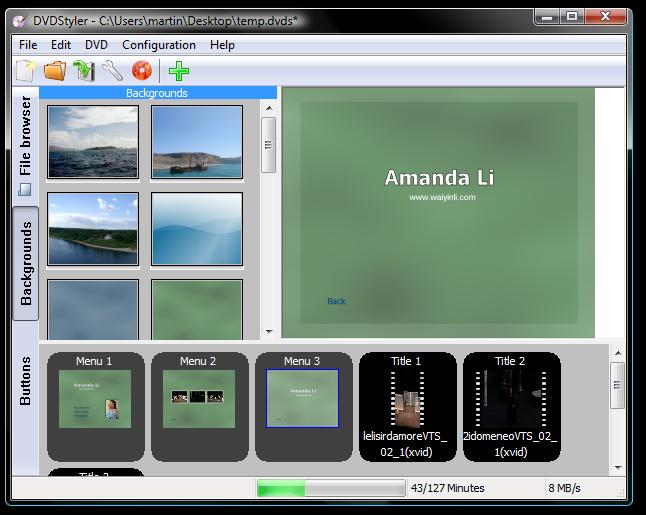 A new menu, called menu 3. This will be used as an information board.
Text and images can be added to the menu3 to populate it as needed.
This menu must be linked to the first menu in order for the user to find it. Buttons can be added from the Button selection panel on the far left if you want to experiment with different styles but to keep things simple, lets just copy another link on the menu1. Make a duplicate link by copying one menu, and pasting it back into the menu page. Use the right click actions on the screen to do this. The new link can be re-labeled appropriately (I named mine “information”) and moved to the correct place.
We must now change the destination of this button. Right click on the new button and go to properties. The button properties menu should appear as shown here.
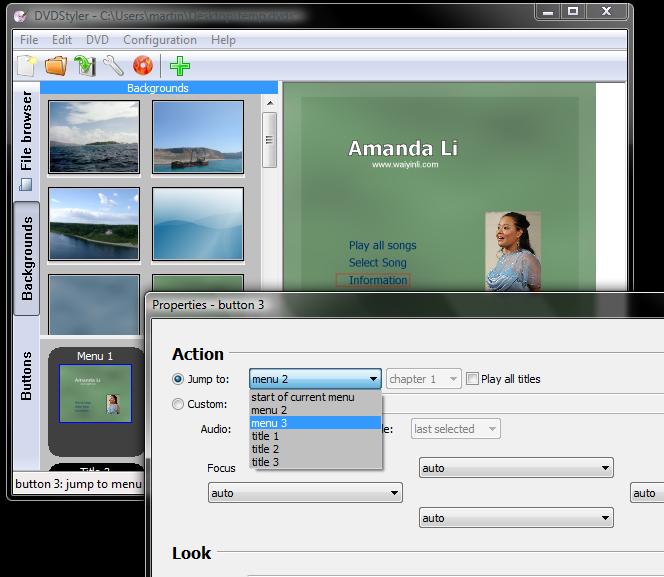 Showing properties dialog for a button.
Using the “jump to” drop down, change to menu 3; the new menu created earlier. This drop down menu represents every menu and video in the DVD image. This means that when this button is pressed, it will go to the selected video or menu.
By using these steps you can create as many menu pages as you like, and have them link in intricate ways to build up a system in any way you want.
Step 9: ‘Burn’ the DVD image
By now you should have a pretty complete DVD layout, consisting of menus, button links and videos. This should now be ready to put on to a DVD! Remember to save your work so far.
This software is capable of burning to a DVD, but I found the burn failed every time I tried. To solve this, I ‘burned’ the DVD to a single image file (an .iso file) which I would then use later on to check on the computer, or burn with another piece of software.
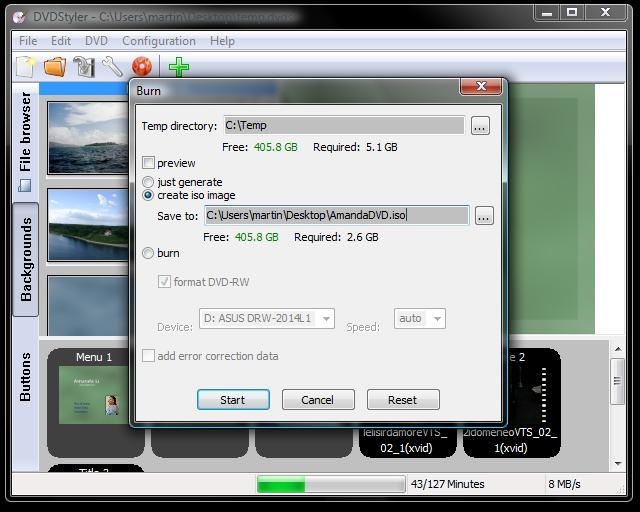
To create the DVD image, click the burn DVD icon (Red burning disc at the top of the main window) or click DVD -> burn DVD, or press F9. This will bring up the Burn DVD dialog as shown here
Ensure the temp directory is set (I set mine to c:\temp, you dont really need to worry about where this is as you wont need to look at these files, but they get quite big so its useful to know where to delete them later on) Click “Create iso image” and select a place to save the iso file to. I put my file on the desktop for easy access. Now click Start to begin the burn.
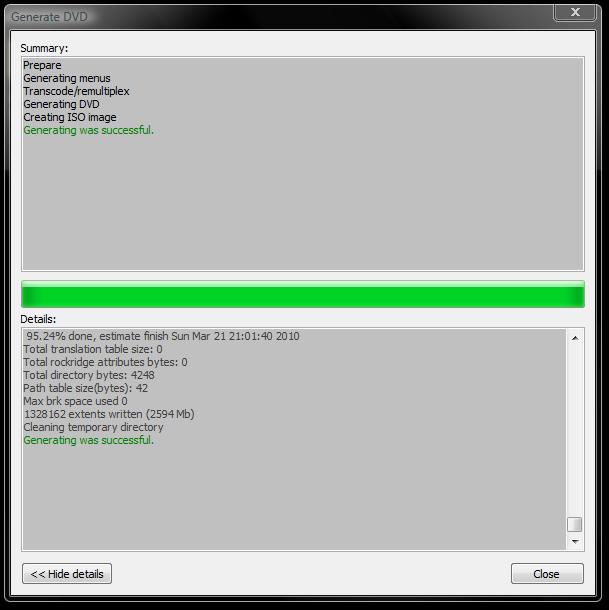
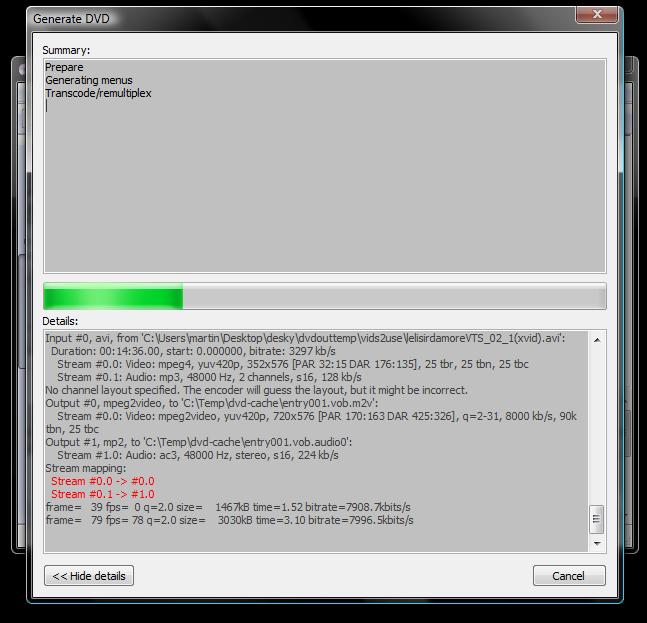 The generate DVD screen. This sits here for at least 30 mins
You will now see the DVD generation dialog. And it will sit there for at least 30 minutes. Unfortunately it will take this long to create the DVD image as there is a lot of re-compression of the videos to do. If you plan on doing this frequently for the same videos, I advise keeping the temporary files folder the same each time, and do not delete the temporary files. That should at least save the time of re-compressing the video files.
After some time you should find the completed DVD message:
In Green letters it will say “Generating was successful”
Check on your destination folder specified before (the desktop in my case) for the new .iso file. This is the image file for a DVD to be burned.
The next step will be to review the DVD image on the computer, to ensure all the work done is fine and to allow for any fixes to be done if necessary.
In the next post I will use WinRar to de-compress the .iso file to the hard-drive, so I can watch the DVD on the computer using VLC player.
